")
Creating Your First Flow
The Flows page in Arc provides a blank canvas where you can begin creating your first workflow.
This guide walks through every step of building a flow in Arc:
- Start with a use case
- Add connectors to the flow
- Connect connectors in a flow
- Understand how connectors are connected
- Configure connectors
- Automate the flow
If you aren't familiar with the tools available in the flows page, check out our Introduction to the Flows Page.
Every Step of Building a Flow
Each Flow starts with a business logic use case. For this article, we'll use the following use case as an example:
A partner needs to transfer CSV files to us using SFTP, and these CSV files need to be compressed and stored locally. If the partner sends us a file with a .err extension, something has gone wrong and this data needs to be emailed to the system administrator.
What File Transfer Connectors to Use?
The starting point for most flows is figuring out what inbound and outbound connections are required. The above use case requires two connections: an SFTP connection for the partner to send us files and an Email connection to alert the system administrator about errors.
So the connectors we need are:
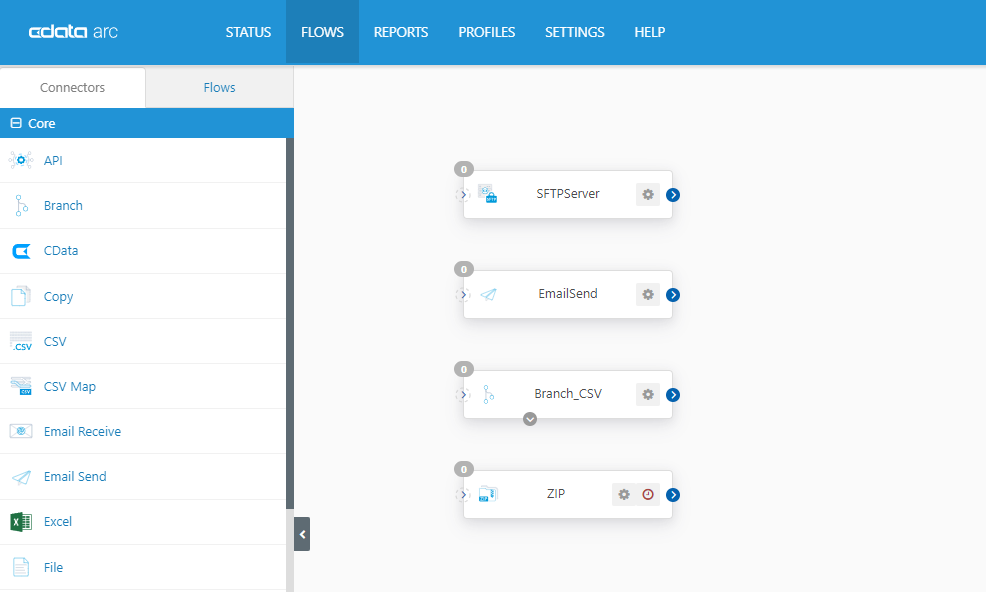
- SFTP Server: to receive files over SFTP, we need to configure the SFTP Server profile and an SFTP Server Connector.
- Email Send: this connector provides full control over outgoing email messages.
We can go ahead and drag these from the Connectors toolbox into the flow canvas and give them appropriate names:

What Logical Connectors to Use?
Now that we have the entry and exit points of the flow, we need to perform some operations on the data in the middle. In this case, we need to detect a file extension and conditionally archive the file we receive.
So the logical connectors we need are:
- Branch: a Branch Connector can route files through the flow based on the filename (in this case, we care about the file extension).
- Zip: we need to compress the data we receive before storing it locally.
Once we drag these from the Connectors toolbox to the canvas, we have all the connectors we need to build the workflow:
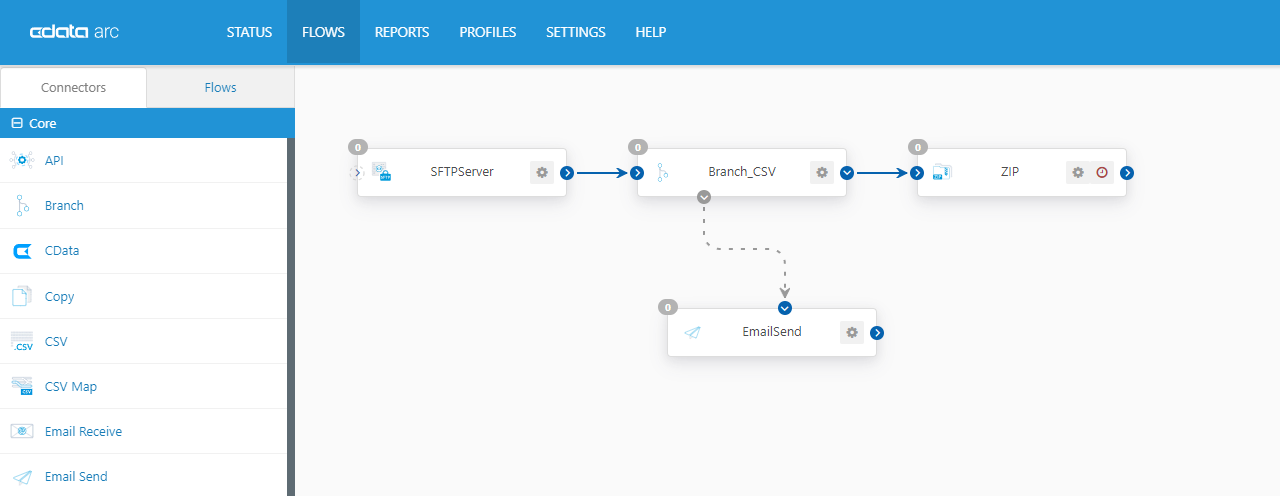
How Should the Connectors be Connected?
The connectors need to be connected to establish the logical flow of data:
- Since the files will be received over SFTP, the SFTP Server Connector is the starting point of the flow.
- The next step is to see if we received a CSV file or a .err file, so the SFTP Server Connector should pass the file off to the Branch Connector for comparison.
- The Branch Connector has two output paths: a solid blue path for files that match the configured pattern and a dotted gray path for files that do not. We'll configure the Branch Connector to look for CSV files, so if the file matches it should be compressed with the Zip Connector.
- If the file does not match the Branch pattern, we assume it is an error file (.err) and should be emailed to the system admin with the Email Send Connector.
Once the connectors are connected, we can see the visual data flow:
What Actually Happens When Connectors are Connected?
Let's take a moment to understand what happens under the hood when connectors are connected in an Arc flow. First, it's important to understand that each connector has an Input/Send Folder and an Output/Receive Folder on the file system.
Input/Send Folder
Files that reach a connector's Input/Send folder are slated to be processed by that connector.
For most Connectors, 'processing' the file means sending the file out of Arc to an external system (e.g. a trading partner, a database, an ERP system, etc). For Transforms, 'processing' the file means applying some sort of data transformation or logical operation on the file but keeping the file in the local Arc system.
As an example for Connectors, if you place a file in the Input/Send folder of an SFTP Client Connector, the connector will upload that file to a remote SFTP server the next time it processes files. As an example for Transforms, if you place a file in the Input/Send folder of a Zip Connector, it will compress (or decompress) the file the next time it processes files.

Output/Receive Folder
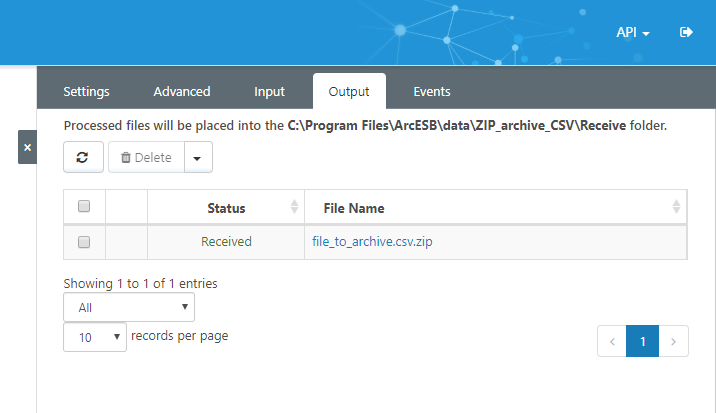
Files that have been processed by a connector are pushed to that connector's Output/Receive folder.
For most Connectors, a 'processed' file is a file that has been received from some external system (e.g. a trading partner). For Transforms, a 'processed' file is a file that has had data transformation or logical operations applied to it already.
As an example for Connectors, if you use an SFTP Client Connector to download a file from an SFTP server, that file will be placed in the SFTP Client Connector's Output/Receive folder. As an example for Transforms, files that are compressed (or decompressed) by a Zip Connector will be placed in the Output/Receive folder after the compression (or decompression) operation is complete.
Connected Folders
When connectorA is connected to connectorB in an Arc flow, the application knows to transfer files from connectorA's Output/Receive folder to connectorB's Input/Send folder.
As a result, after a connector processes/receives a file, that connector automatically passes that file off to the next connected connector for further processing.
We'll now return to building out our example flow.
How Should the Connectors be Configured?
Configuration is always user-specific, but below is a brief overview of the important fields to set for each connector involved in our example flow. Many more properties are available for configuration customization, and please refer to the connector-specific documentation for more details.
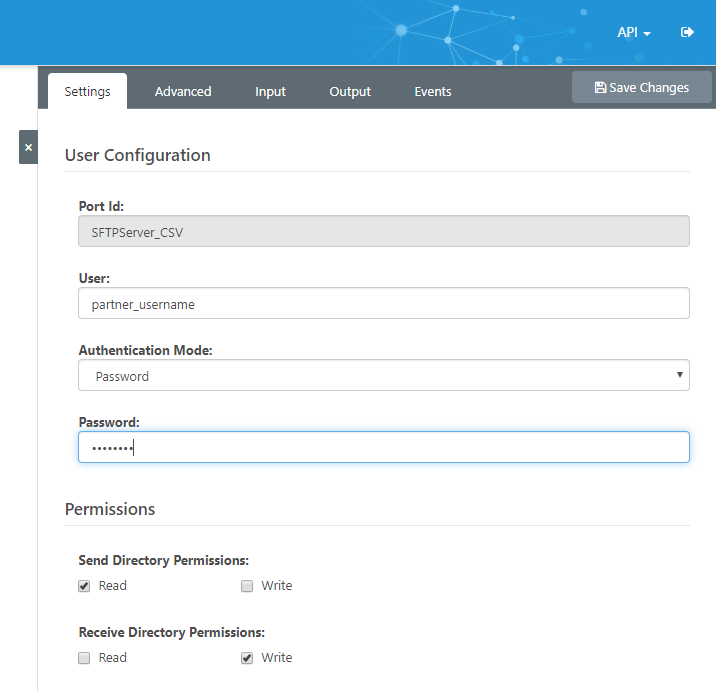
SFTP Server
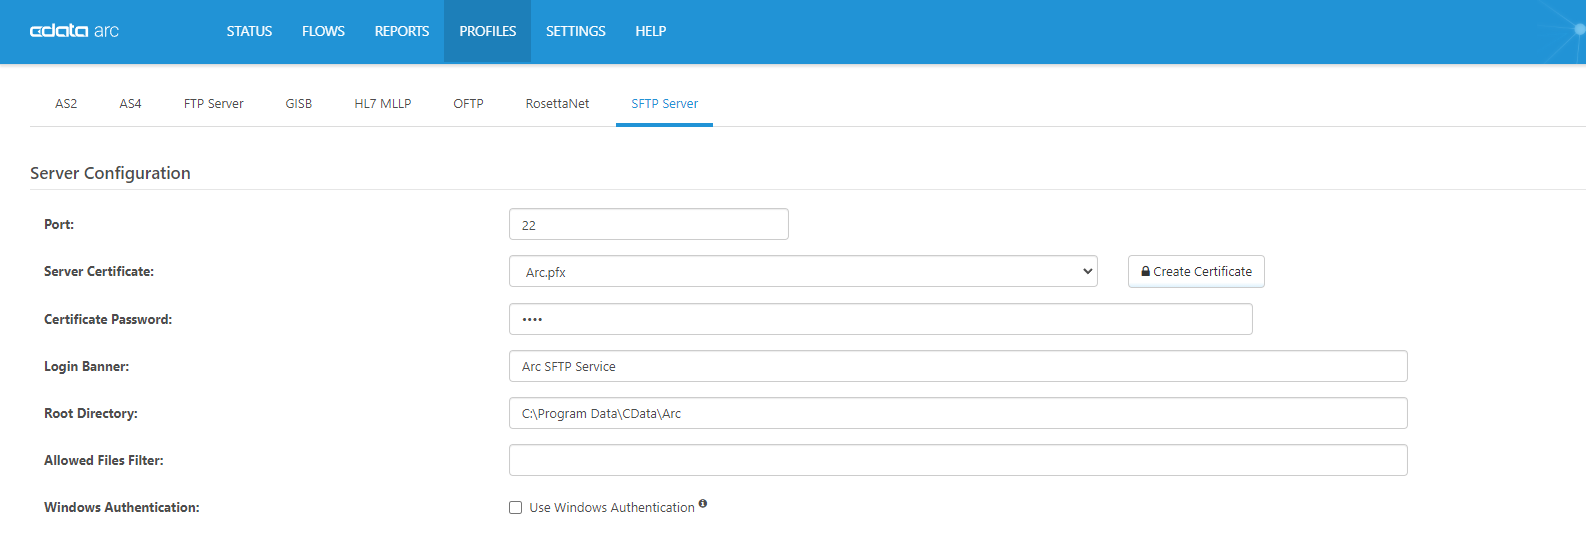
The Arc SFTP Server is configured in two places. Global server settings are configured in the SFTP Server tab of the Profile page (Make sure to save the Flow changes before navigating away from the Flows page!). Then, each individual SFTP Server connector provides authentication credentials for a single partner to connect to the server. Note: when a client uploads files to the SFTP Server, Arc routes the files to the appropriate SFTP Server Connector based on the authentication credentials that the client provided.
The core SFTP Server Profile settings are Connector, Server Certificate, and Certificate Password. These define both the connector where the server will listen for incoming connections and the certificate that the server will use to identify itself.
The core SFTP Server Connector settings are Authentication Mode, User, and (depending on the authentication mode) Password and/or Public Key. Together, these define how the trading partner should authenticate to the SFTP server when connecting.
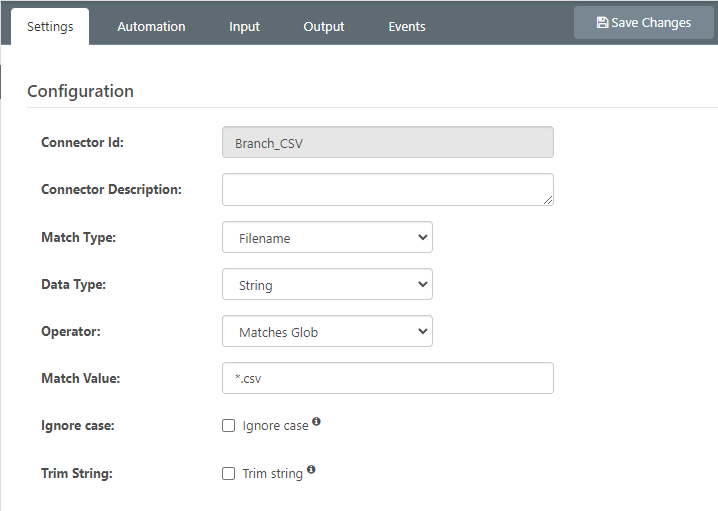
Branch
Branch Connector configuration is handled primarily in the Flows canvas. The Branch Connector can connect to two different connectors in the flow. The solid-blue flow path is used if the input file matches a simple branching rule like a filename or value within a file.Otherwise, the dotted-gray flow path is used.
The Match Value property of the Branch Connector is a glob pattern for determining which flow files should be routed through. In this case, it is should be set to "*.csv" to match CSV files and not-match .err files.
Zip
Zip Connectors offer a range of configuration fields to customize the file compression. For a simple use case like ours, the default compression settings will suffice.
Most importantly, the Operation should remain the default value of 'Compress.'
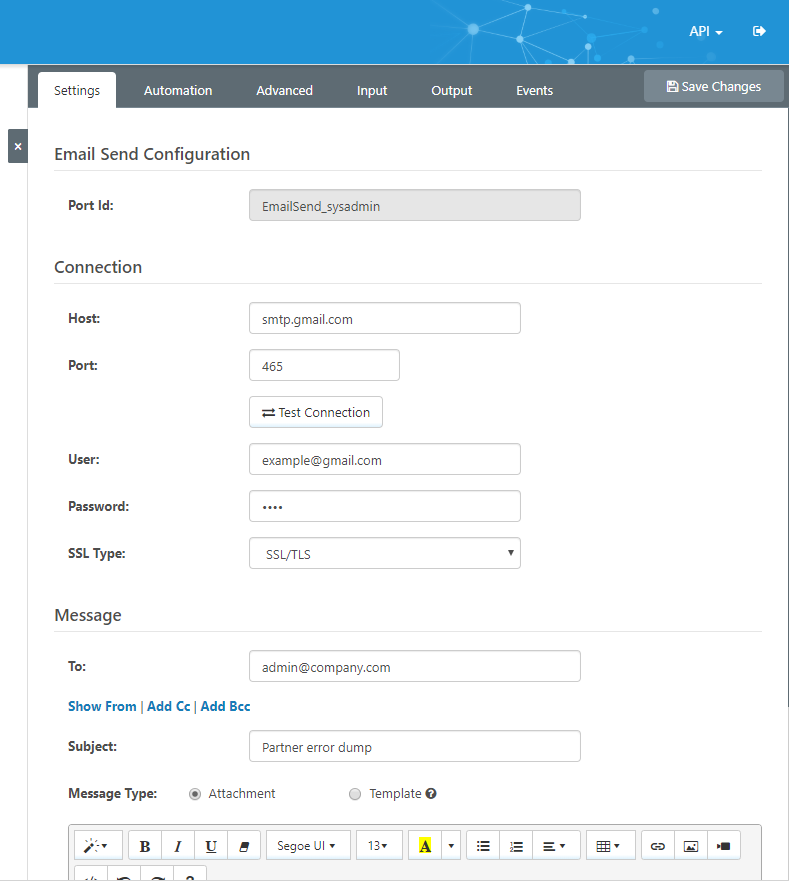
Email Send
Configuring an Email Send Connector requires establishing a connection to an SMTP mail server and specifying the content of the email.
To connect to the SMTP server, the SMTP Host, Port, SSL Type, User, and Password should be specified. For example, to use Google's SMTP server, the following configuration may apply:
- Host: smtp.gmail.com
- Port: 465
- SSL Type: SSL/TLS
- User: my.email@gmail.com
- Password: mypassword
The Email will be sent to the address specified in the To field. Arc will attempt to detect the appropriate From address from the SMTP server credentials. Otherwise, Arc will prompt to configure an explicit From address.
The content of the Email is specified via Subject, Message Type, and the message body text editor. For this example, the Message Type should be set to 'Attachment' so that the .err files are included as attachments in the messages sent to the system admin. For details on using the 'Template' message type, please see the Email Send documentation. Inside the text editor, the body of the email can be set to whatever static text is appropriate for the system admin to understand the context of the email.
Automating the Configured Flow
Each connector has an Automation tab in its configuration panel. Within the Automation tab, Send Automation can be enabled to instruct the connector to automatically poll its Input/Send folder for files to process.
Once all connectors in a flow are connected, and Send Automation is enabled for each connector, files will automatically pass through the entire data flow.
For some Connectors, enabling Receive Automation may be required to automate the flow. For example, some Arc flows may start by downloading files from a remote SFTP server. This download would be performed by an SFTP Client Connector, and that connector would need to have Receive Automation enabled to automatically poll the remote server for files.
In our example flow, Receive Automation is not required, as the SFTP Server passively waits for files to enter the flow.
Ready to get started?
Use Arc's free 30-day trial to start building your own custom workflows today: